Creation of shared directories for Windows Server with Hyper-V
- Creation of shared directories for Windows Server with Hyper-V for the Hyper-V datacollector
- Customize output path in script
Creation of shared directories for Windows Server with Hyper-V for the Hyper-V datacollector
This guide describes how to create and configure a shared directory structure for the CIO Cockpit data collector for Hyper-V on a Windows Server.
1. Create directory
On the windows server, create a directory for the needed script file at any system location. Either the script for the standalone operating mode or the script for the cluster operating mode can be stored in this directory. This directory can e.g. be named "scripts". In addition to the respective script, another directory is created, which can e.g. be named "output". The output CSV file will automatically be stored in this directory.
Hint: Please do not rename the scripts because they are used in other scripts!
2. Share directory for output
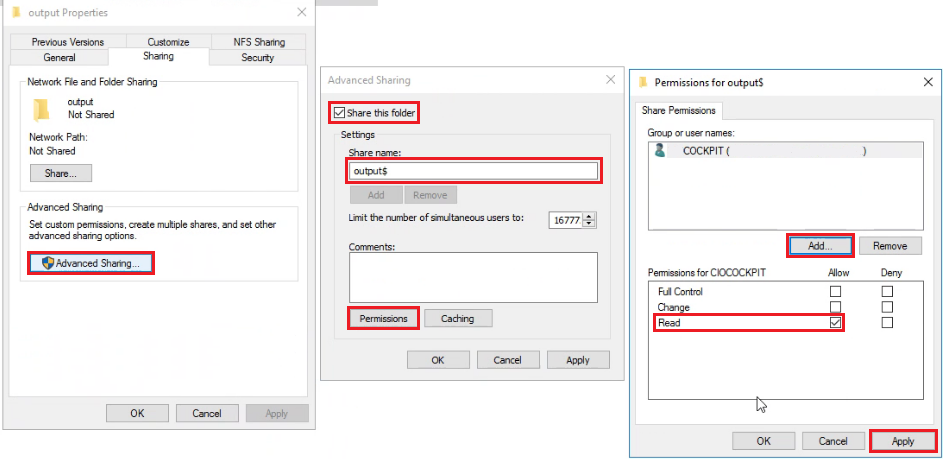
Right-click on the „output“ directory (the directory where the CSV file will be placed later) and click on „Properties“. Open the „Sharing“ tab and click on the „Advanced Sharing“ button. In the „Advanced Sharing“ window check the „Share this folder“ box and enter the name of the directory followed by a $ sign (dollar sign) under „Share name“. Then click on the „Permissions“ button and in the dialog that opens up, remove „everyone“ and add the cockpit user. Assign the permission „Read“ as „Allow“ and confirm.
3. Configure advanced security settings
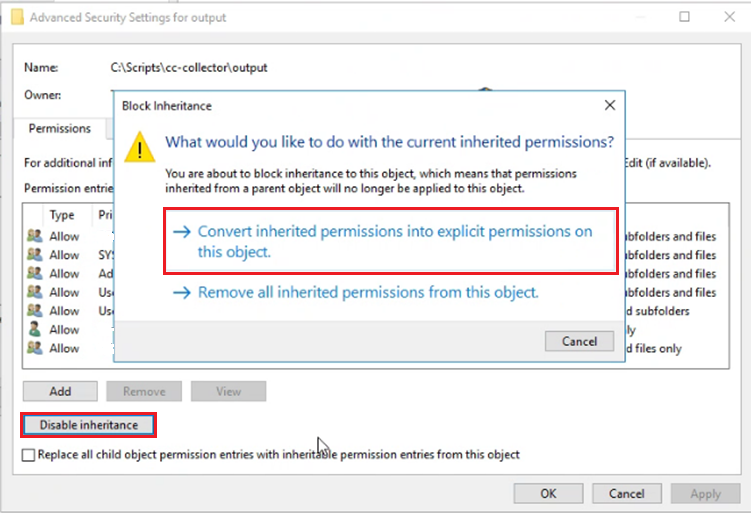
Right-click on the „output“ directory (the directory where the CSV file will be stored later) and click on „Properties“. Open the „Security“ tab and click on the „Advanced“ button there. In the „Advanced Security Settings“ window click on „Disable inheritance“ and in the dialog box select the entry „Convert inherited permissions into explicit permissions on this object“.
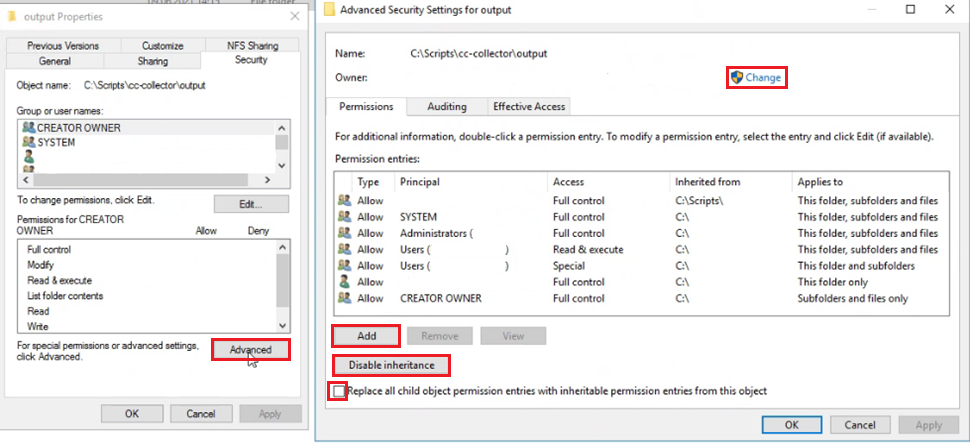
Then you can remove all groups and users that should not have access to the directory. Now click on the blue marked button „Change“ with admin rights. Here the local system is selected under „Locations“.
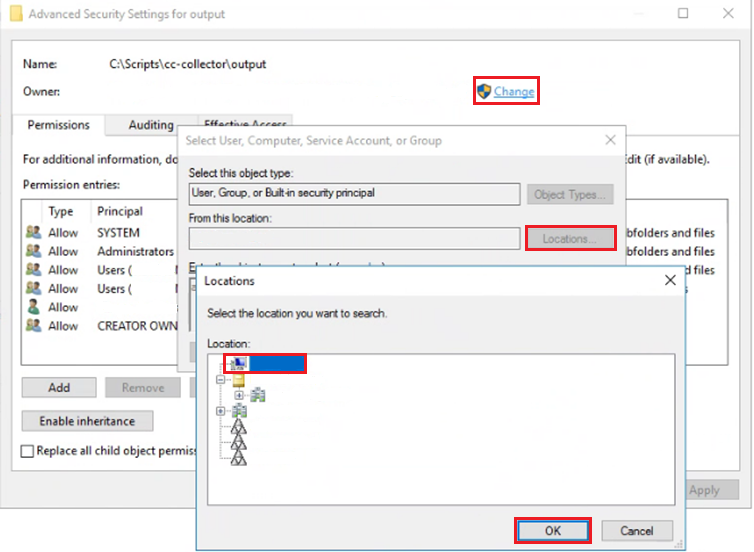
In the same window, the owner of the directory needs to be set to the local administrator group. Confirm with „OK“.

Then check the „Replace all child object permission entries with inheritable permission entries from this object“ box.
4. Edit permissions for groups and users
Right-click on the „output“ directory (the directory where the CSV file will be stored later) and click on „Properties“. Open the „Security“ tab and click on the „Edit“ button there. In the window „Permissions for“ click on the button „Add“ and add the cockpit user.
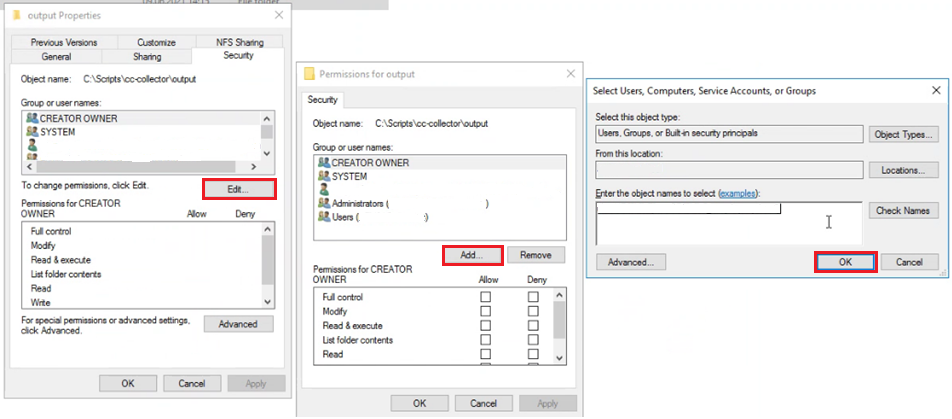
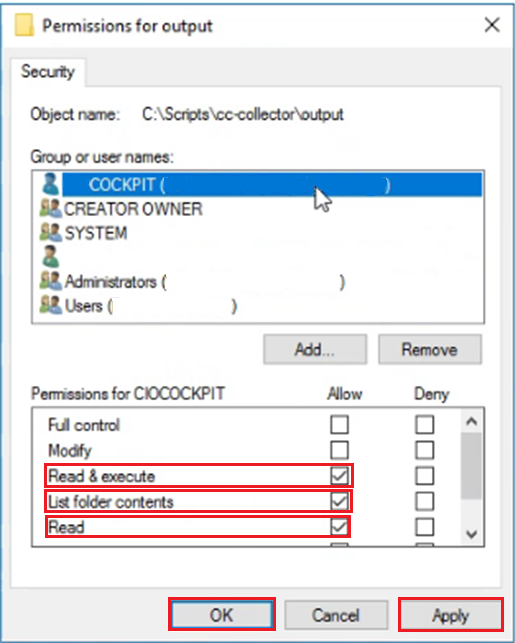
Assign the permissions „Read & execute“, „List folder contents“, „Read“ as „Allow“ to the cockpit user in the „Permissions for“ window.
Customize output path in script
In the downloaded script the variable "$filepath=" is changed to the file path that was created in the previous steps, and the name of the output file is set. An example of this is "C:\scripts\cc-collector\output\cc-output.csv". The shared directory can be specified as a path when creating the datacollector in Datacollection-Management. The following scheme is used for this purpose: \SHAREDDIRECTORY$\OUTPUTFILE.csv