Configuration of Windows-Hosts via domain controller
- Configuration of Windows-Hosts via domain controller for the Windows host datacollector
- 1. 1. Create CIO Cockpit user in the domain
- 2. Create OrganizationalUnit (OU) in the domain
- 3. Create CIO Cockpit user group in the OU
- 4. Add CIO Cockpit users to the CIO Cockpit user group
- 5. Create CIO Cockpit computer group in the OU
- 6. Add hosts to the CIO Cockpit computer group
- 7. Add hosts to the OU
- 9. Configure WinRM service
- 10. Switch on WinRM service
- 11. Firewall configuration for Windows Remote Management
- 12. Assignment of rights for CIO Cockpit users
- 13. Define target systems of the CIO Cockpit GPO
- 14. Application of the group policy to all hosts to be integrated into the CIO Cockpit
- 15. WMI configuration for all hosts to be integrated into the CIO Cockpit
- Adding a Host Later
- Note
Configuration of Windows-Hosts via domain controller for the Windows host datacollector
This guide describes how to configure Windows hosts for the CIO Cockpit data collector for Windows hosts in a Windows domain. The hosts are configured using GPO and powershell script.
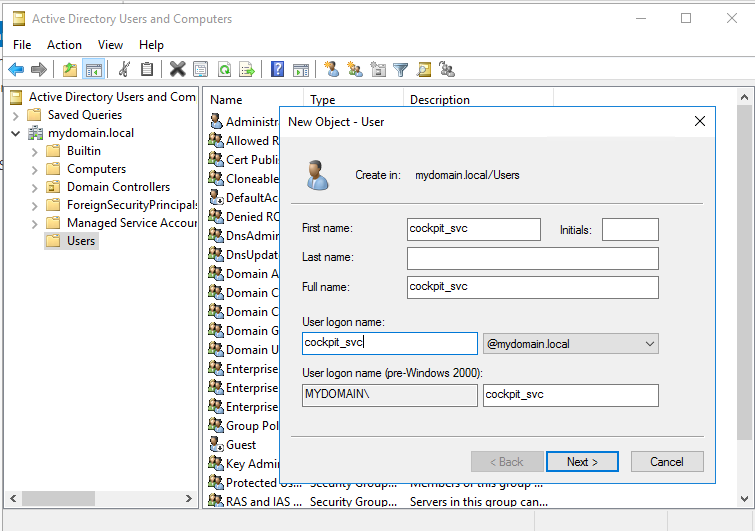
1. 1. Create CIO Cockpit user in the domain
A CIO Cockpit user is created in "Active Directory Users and Computers", for example cockpit_svc. Instructions: Active Directory Users and Computers > Domain name > Users > Right click > New > User
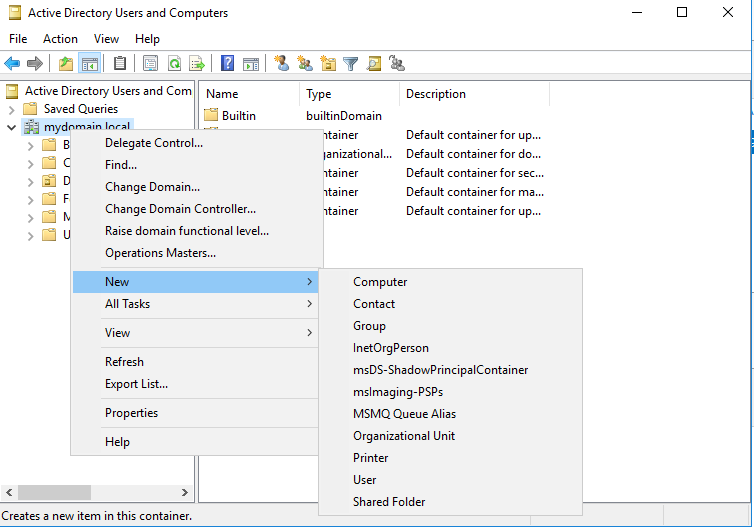
2. Create OrganizationalUnit (OU) in the domain
In "Active Directory Users and Computers" an OU is created for the hosts that are to be included in the CIO Cockpit. Alternatively, these instructions can be applied to already existing OUs. Note: The default starter GPOs for the firewall must be enabled before the OU is created. This is necessary to apply the GPOs - created in a later step - to the hosts. To do this, open the container "Starter GPOs" in the corresponding domain in "Group Policy Management". If no GPOs are visible in the right window under "Content" and instead a button labeled "Create Starter GPOs Folder" is displayed, this button must be clicked. Instructions: Active Directory Users and Computers > Domain Name > Right Click > New > Organizational Unit
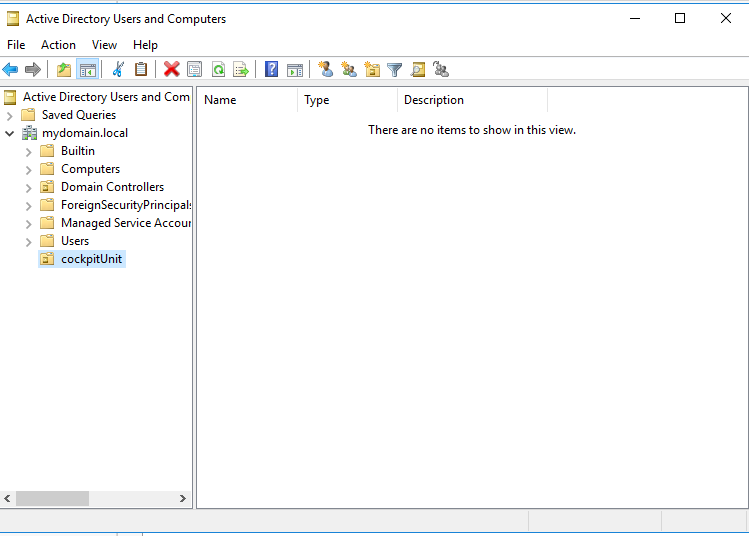
Once created, the OU appears under the domain.
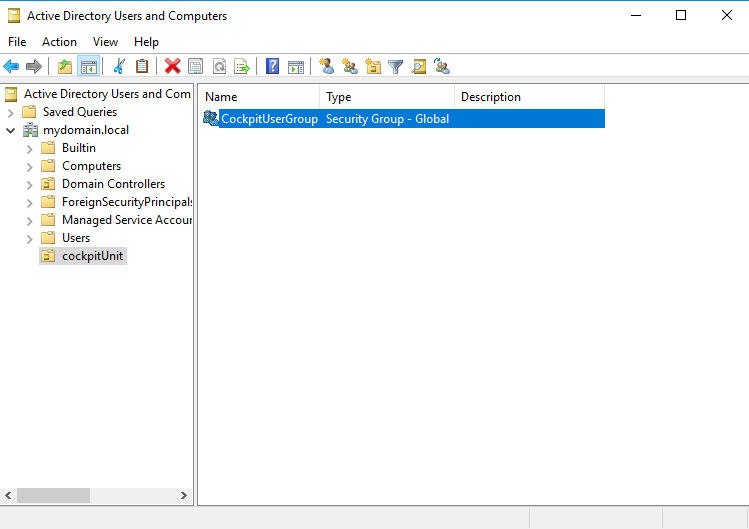
3. Create CIO Cockpit user group in the OU
A CIO Cockpit user group is created in "Active Directory Users and Computers".
Instructions: Right click on the OU created in step two (or the OU used instead) > New > Group. The default settings (Group scope: Global, Group type: Security) can be kept.
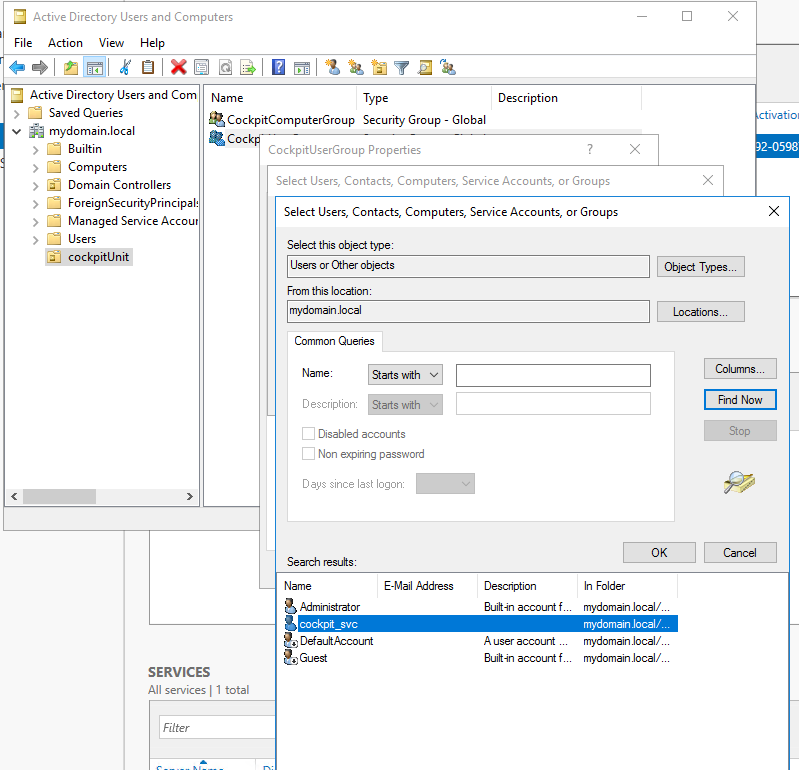
4. Add CIO Cockpit users to the CIO Cockpit user group
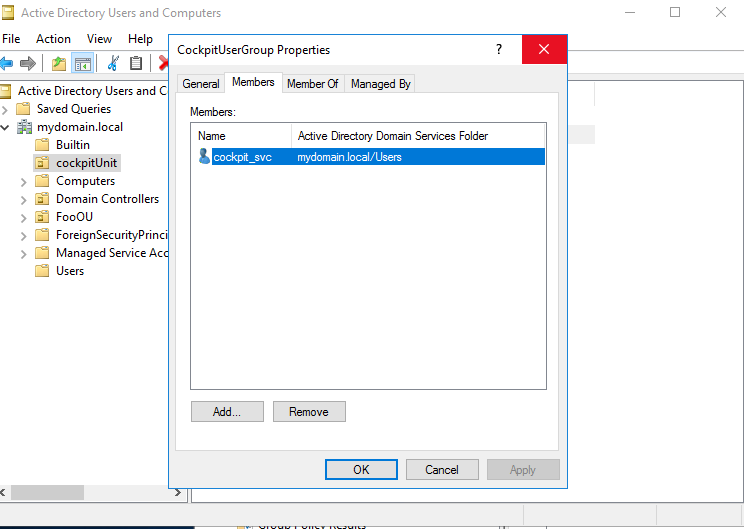
The CIO Cockpit user created in step 1 is added to the CIO Cockpit user group. Instructions: Right click on CIO Cockpit User Group > Properties > Members tab > Add
Result:
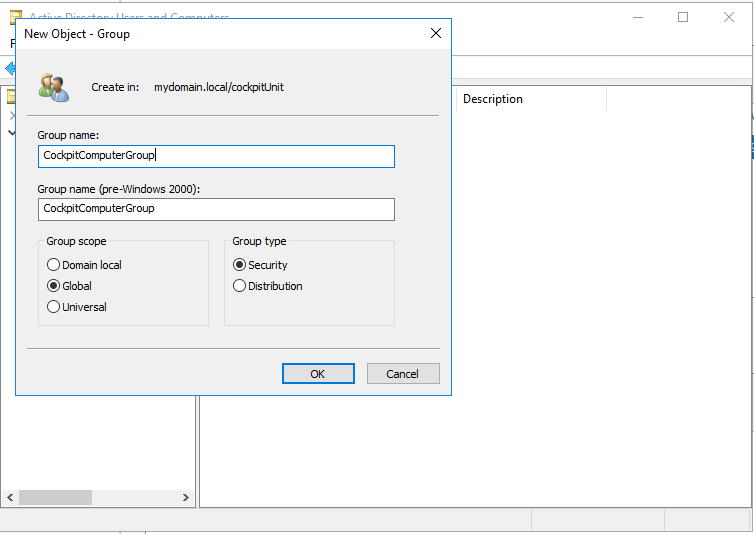
5. Create CIO Cockpit computer group in the OU
As in step 3, a CIO Cockpit computer group is created in "Active Directory Users and Computers". Instructions: Right click on the OU created in step two (or the OU used instead) > New > Group. The default settings (Group scope: Global, Group type: Security) can be kept.
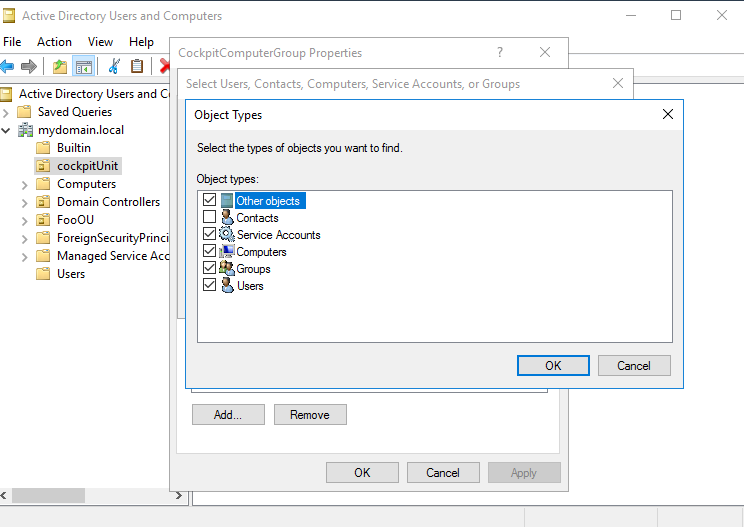
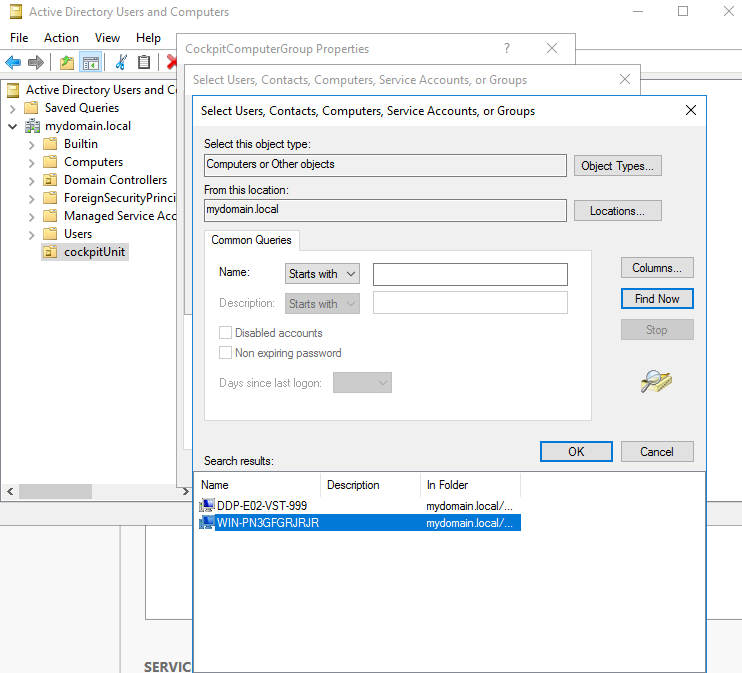
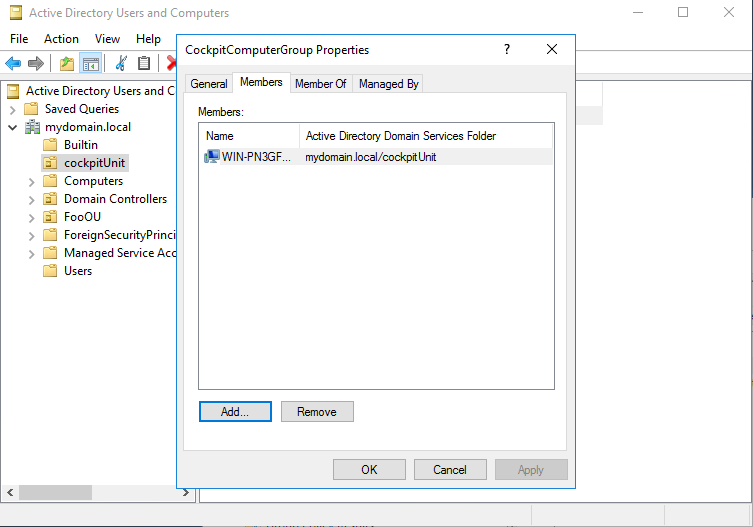
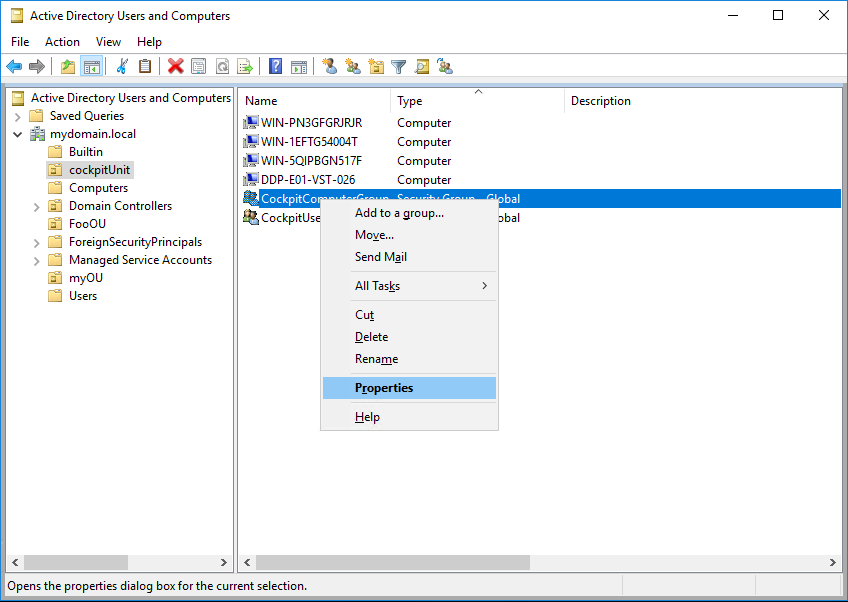
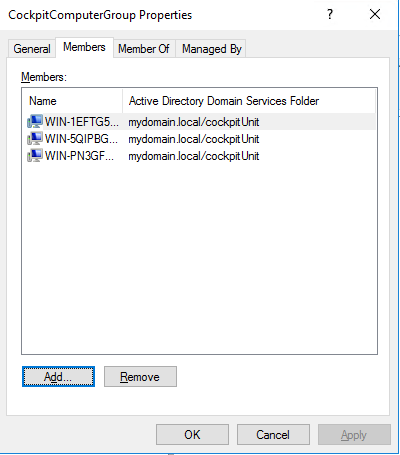
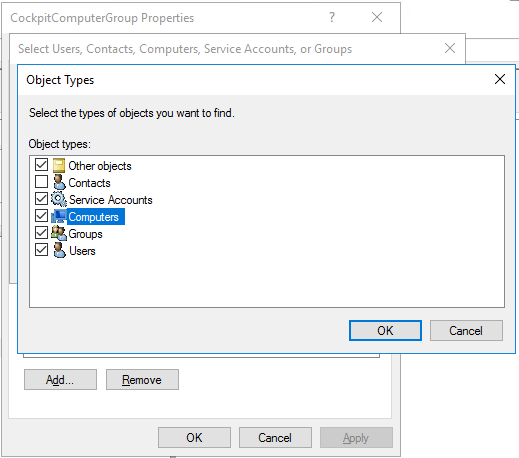
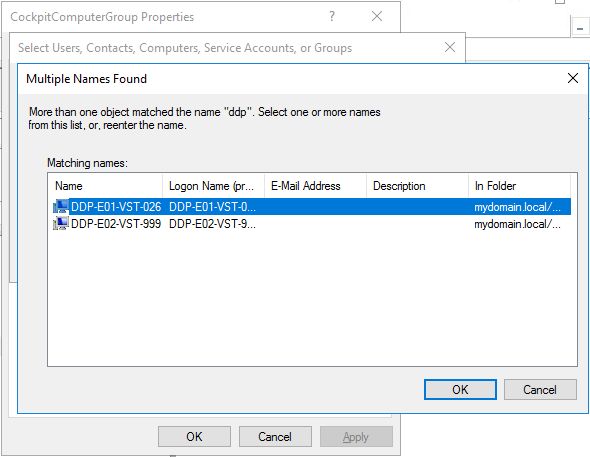
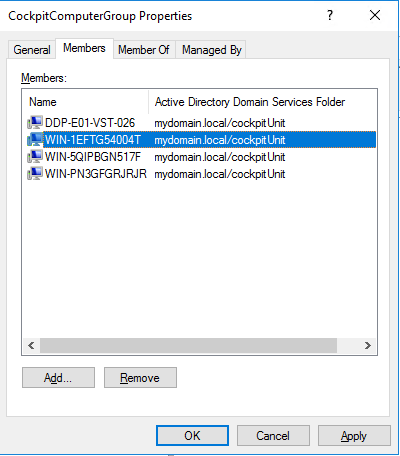
6. Add hosts to the CIO Cockpit computer group
The hosts to be integrated into the CIO Cockpit are added to the computer group created in step 5. Instructions: Right click on CIO Cockpit computer group > Properties > Members tab > Add (In the "Select Users, Contacts, Computers, Service Accounts or Groups" menu, it may be necessary to click on the "Object Types" button and check "Computers").
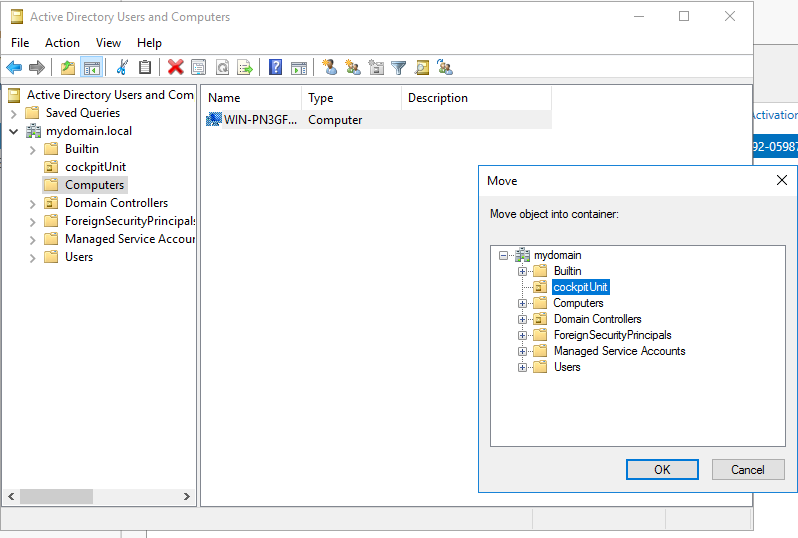
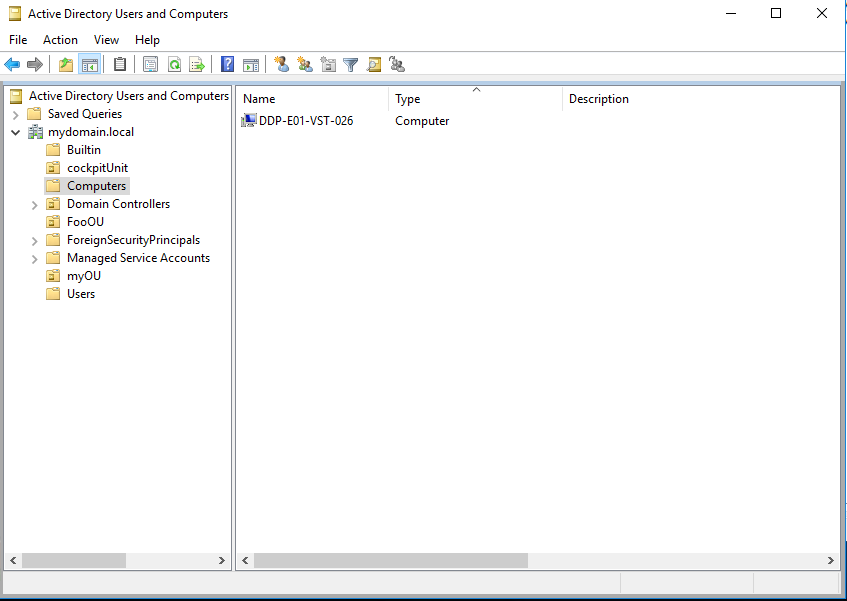
7. Add hosts to the OU
The hosts to be integrated into the CIO Cockpit are added to the CIO Cockpit OU (or the OUs used instead). Instructions: Active Directory Users and Computers > Domain Name > Computers: The entries can either be moved into the OU by drag & drop or by right clicking on the entries: Move > Select OU > OK
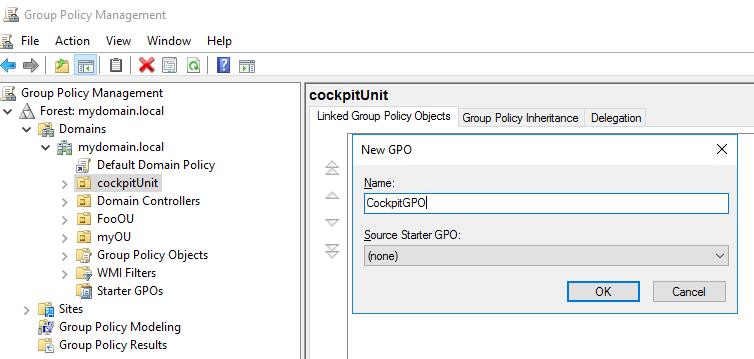
- Create CIO Cockpit Group Policy Object (GPO) Most of the settings necessary for the operation of the Windows Data Collector are configured via this GPO. Instruction: An entry for the CIO Cockpit-OU already exists in "Group Policy Management".
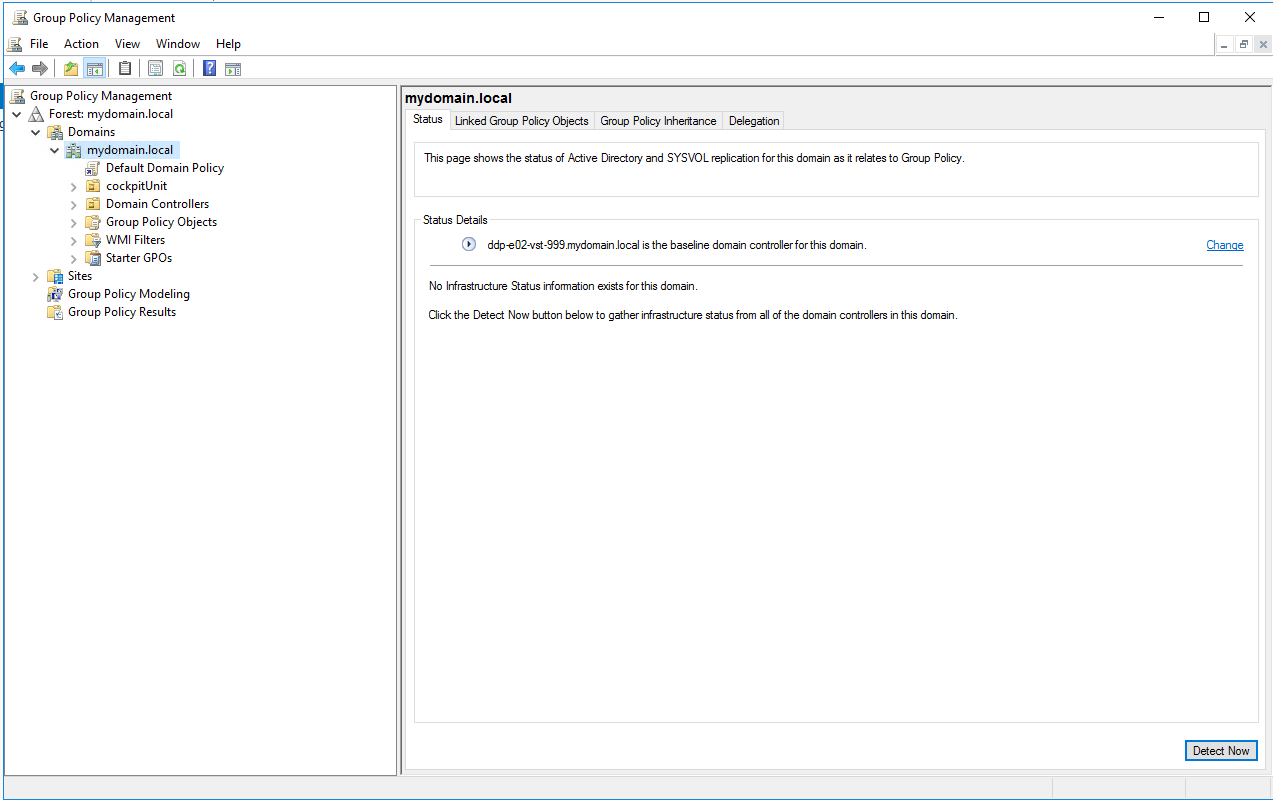
Right click on this OU > "Create a GPO in this domain and link it there" and select any name.
Now the GPO needs to be configured. To do this, right click on the GPO > Edit. The Group Policy Management Editor opens.
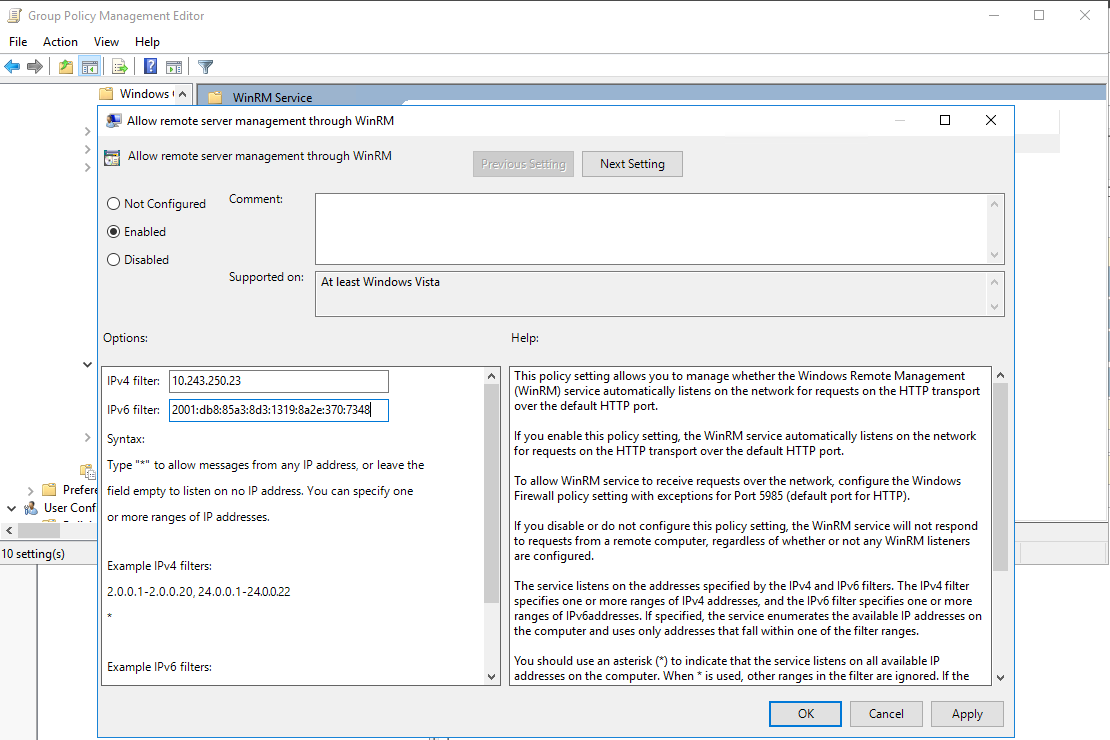
9. Configure WinRM service
Instructions: In the Group Policy Management Editor: Computer Configuration > Policies > Administrative Templates > Windows Components > Windows Remote Management (WinRM) > WinRM Service > Allow remote server management through WinRM > Right click > Edit: Set enabled and fill in the fields "IPv4 filter" and "IPv6 filter" under “Options” (below). Here you should at least enter the IP of the VM on which the Windows Data Collector Management is running. A star enables all IPs (not recommended). You can also configure IP ranges.
Note: If there are multiple IPs to be configured, they must be entered als IP ranges,
for example 10.0.0.23-10.0.0.23,10.0.0.42-10.0.0.42.
A comma separated listing of multiple IPs, for example 10.0.0.23,10.0.0.42, is not supported by Microsoft in this dialog.
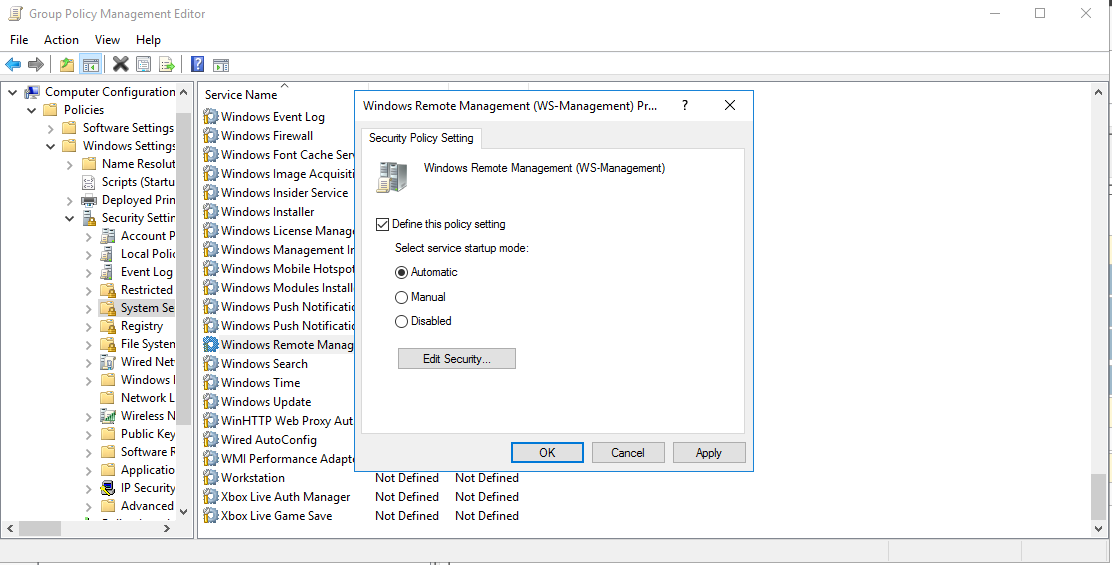
10. Switch on WinRM service
Instructions: In the Group Policy Management Editor: Computer Configuration > Policies > Windows Settings > Security Settings > System Services > Windows Remote Management (WS-Management): Activate “Policy” and set “Service Startup Mode” to “Automatic”:
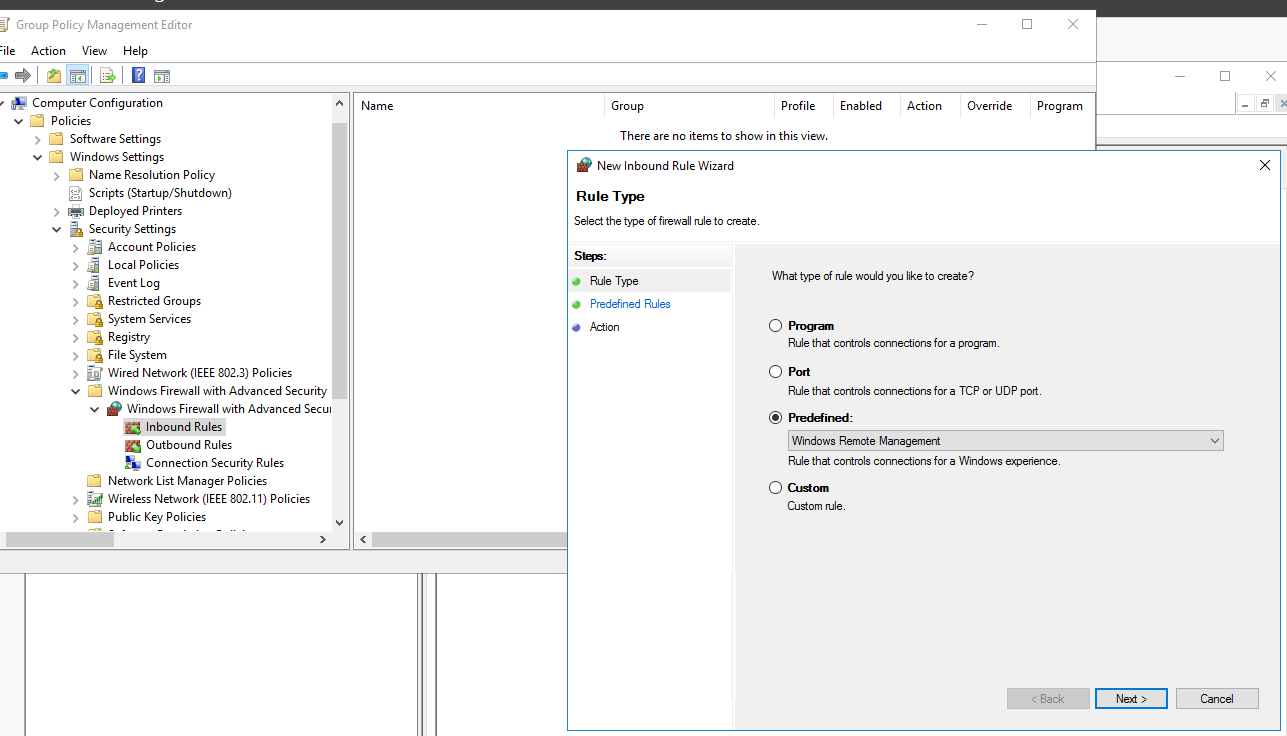
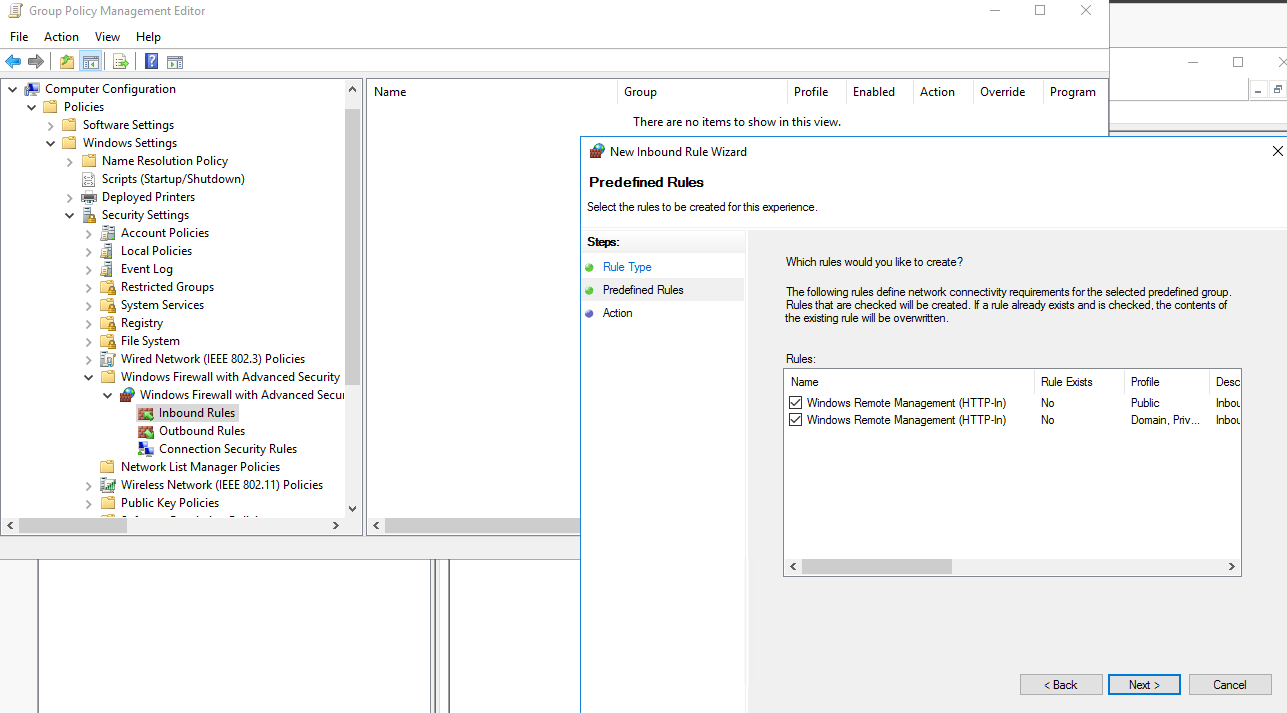
11. Firewall configuration for Windows Remote Management
Instructions: In the Group Policy Management Editor: Computer Configuration > Policies > Windows Settings > Security Settings > Windows Firewall with Advanced Security > Inbound Rules: The rule for Windows Remote Management predefined by Microsoft is applied here.
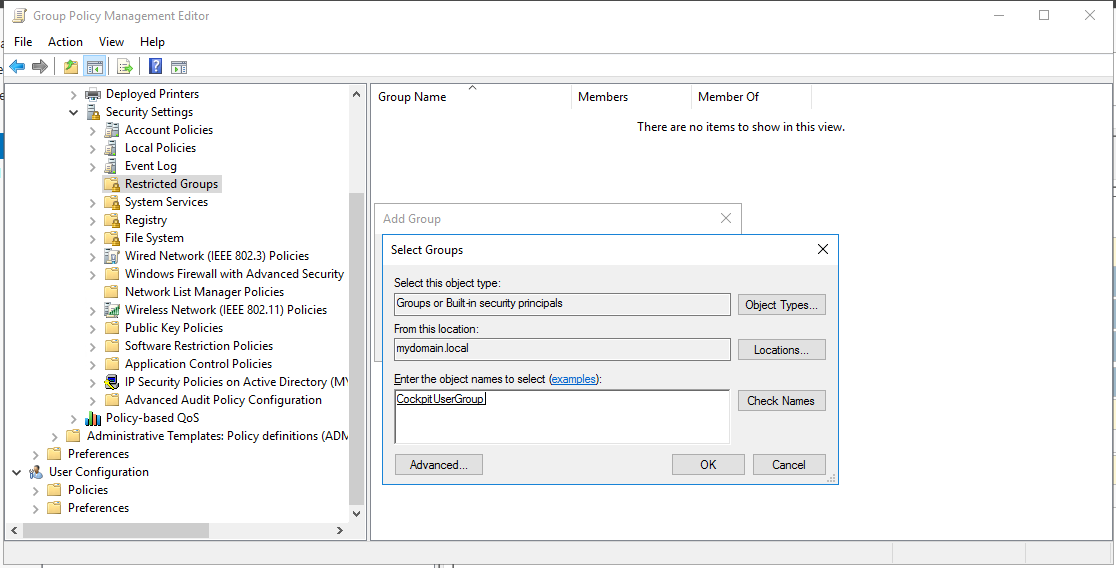
12. Assignment of rights for CIO Cockpit users
Instructions: In the Group Policy Management Editor: Computer Configuration > Policies > Windows Settings > Security Settings > Restricted Groups > right click > AddGroup > Select and add the CIO Cockpit user group which was created in step 3
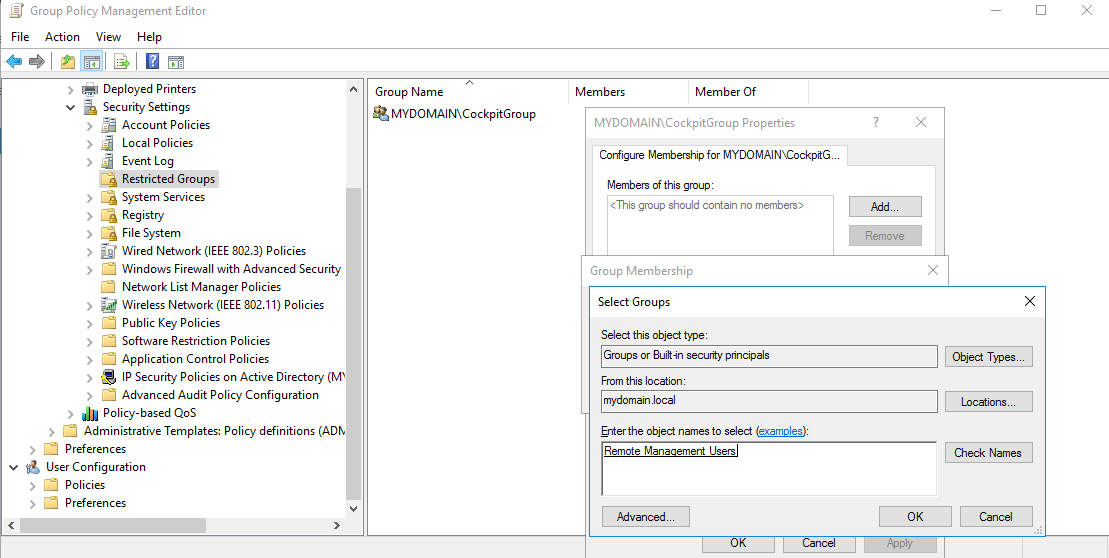
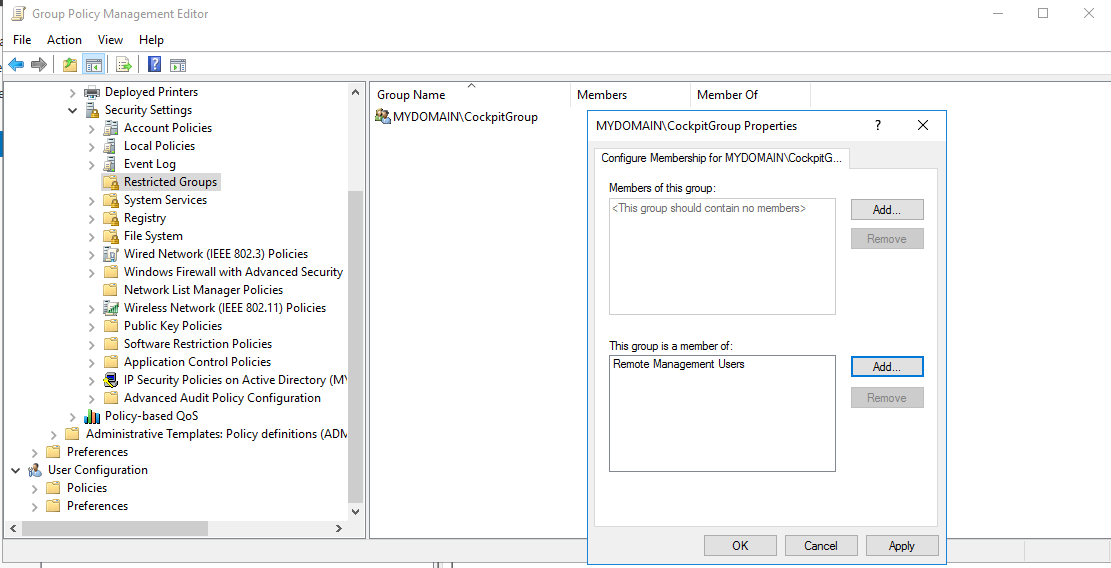
Then right-click on the CIO Cockpit User Group > Properties > Add (next to the lower field "This group is a member of") > Select and confirm the group "Remote Management Users”
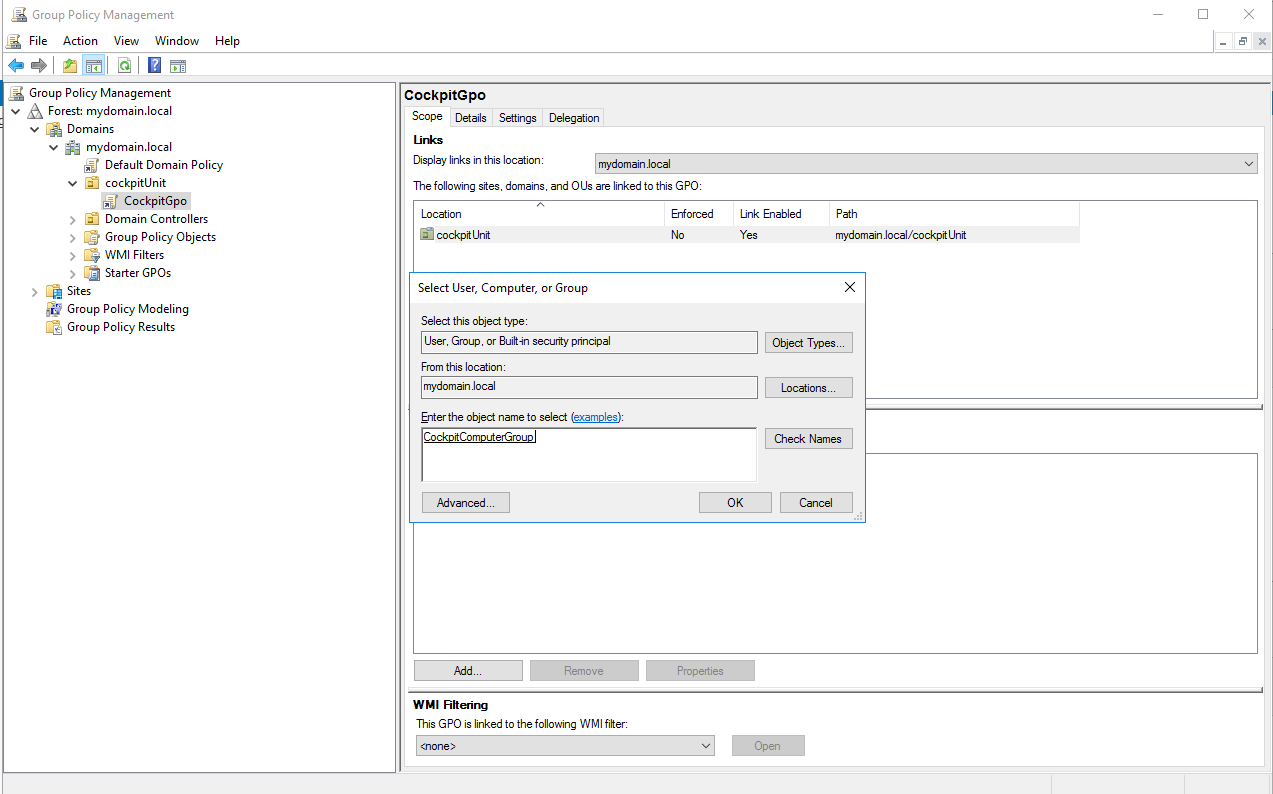
13. Define target systems of the CIO Cockpit GPO
Instructions: In "Group Policy Management" select the CIO Cockpit GPO > “Scope” tab > "Add" under "Security Filtering" (below) > Enter the CIO Cockpit computer group created in step 5:
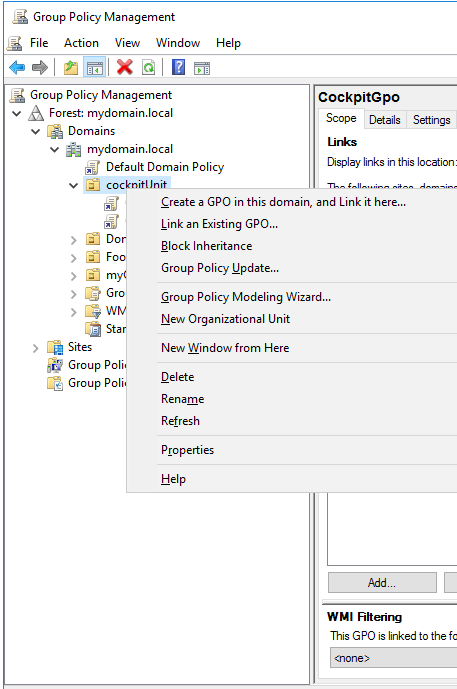
14. Application of the group policy to all hosts to be integrated into the CIO Cockpit
Instructions: In "Group Policy Management" right click on the CIO Cockpit-OU > Group Policy Update
15. WMI configuration for all hosts to be integrated into the CIO Cockpit
WMI must be configured on the target systems for remote read access (Account enable and Remote enable permissions). This permission is set using a powershell script. The script must be run on the domain controller with domain admin privileges.
Instruction:
- Download and unzip the Powershell-Script hier. There are two scripts included.
- Navigate to the folder with the scripts in a Powershell-Terminal
- Run ad.ps1 (example: .\ad.ps1 CockpitUserGroup CockpitComputerGroup MYDOMAIN)
Parameters (in this order):
- The CIO Cockpit user group created in step 3
- The CIO Cockpit computer group created in step 5
- The domain
Adding a Host Later
The following steps all take place on the ActiveDirectory domain controller.
Requirements
The new host is in the domain.
1. Active directory users and computers
Status
- The new host is located in "Active Directory Users and Computers" after adding it to the domain -> -> "Computers”
- CIO Cockpit computer group “ComputerGroup” and CIO Cockpit computer group “UserGroup” are set up
Steps
- Move (drag & drop) the computer into the existing CIO Cockpit OU (alternatively: add in the OU via "new" -> "Computer")

- In the CIO Cockpit OU, select the CIO Cockpit ComputerGroup -> Properties -> Members -> Add: Add the new computer. It may be necessary to select the type "Computer" under "Object Types" in order for the computer to be found.
2. Apply GPO to new host
Instructions: Group Policy Management context menu on "Group Policy Management" -> "Forest: Domain" -> "Domains" -> Domain -> CIO Cockpit Unit: "Group Policy Update
3. WMI configuration of the new host
Instructions: Execute ad-wmi script from the tutorial under Powershell with the arguments described in the tutorial.
Note
It may take time for all GPO settings to become active on the hosts. You can force the update by running "gpupdate /force" on the hosts.